Many buyers found that a low-cost projector fell short outdoors. Brightness, image clarity, and reliable connection often disappointed them during movie nights. A device that worked indoors did not always handle ambient light or distance well.
Users learned that lamp brightness and fan cooling mattered more than price. Dust on the lens or blocked vents reduced image quality and shortened lamp life. HDMI input or cable signal drops turned simple setups into a frustrating technical issue.
Practical troubleshooting helped many avoid service calls. Basic checks of power, cables, settings, and audio output fixed sound loss or flicker. The Yaber T2 Plus GTV, for example, offered about 2.5 hours of battery time, but battery life did not solve weak brightness or color quality.
This short guide previews common hardware limits and offers solutions to manage light, improve focus, and protect cooling and vents. Readers will get quick tips to extend life, stabilize connection, and boost overall projection quality.
Understanding the Risks of Budget Projection Gear
A small mismatch in settings or screen type often makes an otherwise fine unit look unusable. Projectors are sensitive to setup and to the environment more than a TV. That sensitivity can make faults seem like hardware failure.
Many users assume the device is dead when a black display appears. In reality, simple settings or signal choices cause most of these issues. Power-saving mode, wrong input, or a muted source will hide the image.
- One box handles power management, optics, and signal decoding; each part reacts to light and position.
- The apparent brightness of a lamp depends on the type of screen and ambient light levels.
- When the unit is set to eco mode, the image may look far dimmer than spec.
Bottom line: understanding limits and taking a few calibration steps usually clears early frustration. Many owners report that fixing settings and adjusting the screen restores expected performance.
Common Cheap Portable Projector Problems and Their Origins
A majority of user complaints came from connection and setup errors, not component failure. Troubleshooting often fixed the issue without a return or repair.
The Reality of Hardware Limitations
Thermal and optical limits are real. Blocked vents or dust on the lens can trigger thermal protection and dim or shut down the device.
The lamp and optical engine are sensitive. Low-quality cables and loose HDMI or input connections cause flicker or signal loss.
Misunderstood System Behavior
Signal handshakes between a source device and the unit cause many faults. A mismatch in refresh rate — most projectors expect 60Hz — can produce a persistent black screen.
- Verify HDMI and input selection before assuming hardware failure.
- Keep vents clear and clean the lens to protect lamp life.
- Respect the recommended throw distance to avoid irreversible focus issues.
Bottom line: simple checks of cables, settings, and environmental light save time and reveal solutions more often than a service call.
Troubleshooting Power and Startup Failures
A failed startup often traces back to a simple power or cable fault rather than internal failure. Begin with the basics before assuming a major repair is needed.
Check the power path first. Plug the device directly into a wall outlet to rule out a faulty strip. A damaged power cable can stop the unit from getting the startup current it needs and leave the indicator light dark.
Power Supply and Cable Integrity
If the unit shuts down suddenly, it often activated thermal protection to save the lamp. Wait 20 to 30 minutes to allow proper cooling before attempting a restart.
- Verify HDMI and input connections; cables fail more often than the device.
- If the fan does not spin and there is no light, an internal fuse or board fault may be present and needs professional service.
- Ensure a stable power connection so the internal startup sequence can complete and display an image.
Final tip: swap known-good cables and try another outlet before scheduling service. This simple troubleshooting clears most startup issues and saves time.
Resolving Image Quality and Focus Issues
Sharp focus and true colors start with correct placement and clean optics. Small setup errors can blur the image or wash out colors. A quick check of distance, lens, and settings resolves most faults.
The Impact of Throw Distance
Achieving a sharp image requires the projector to sit within its specified throw distance. Focus adjustment cannot fix gross placement errors.
- Measure from lens to screen and compare with the manual for the correct throw range.
- Move the device forward or back to get the best focus before tweaking settings.
- Use a quality projector screen to improve brightness and contrast in ambient light.
Keystone Distortion Realities
Keystone correction fixes trapezoid shapes but reduces detail. Use it sparingly.
- Physically align the projector when possible instead of relying on digital correction.
- Excess correction can soften edges and alter colors.
- If the image is too dark, check the projector mode and ensure the lamp is not in eco mode.
Lens Maintenance
Dust on the lens scatters light and makes the image look blurry. Clean only with a microfiber cloth to protect coatings.
- Wipe gently; avoid paper towels or clothing that can scratch the lens.
- Keep air vents clear to protect lamp life and overall device health.
- For persistent issues, check source device, hdmi input, and cable connections or follow a step-by-step guide like how to fix a projector.
Managing Audio Routing and Sound Output
Audio routing errors often hide themselves as silent nights while the image plays perfectly. When the image is present but there is no sound, the source may still send audio to its internal speakers instead of the projector.
Always confirm the HDMI cable can carry both audio and video. Some older or damaged cables fail to pass sound even when the image looks fine.
HDMI splitters and converters can cause HDCP security mismatches. If audio exists but video is missing, remove splitters and connect the source device directly to the projector to test the connection.
- Check the projector’s audio settings and ensure volume is not muted and the correct output is selected.
- Try switching the source’s audio output to PCM or Stereo if the device fails to decode modern formats.
- Swap cables and inputs to rule out faulty cables or an incompatible input mode.
Final tip: direct connections and simple format changes solve most sound and signal issues without extra power or complex adapters.
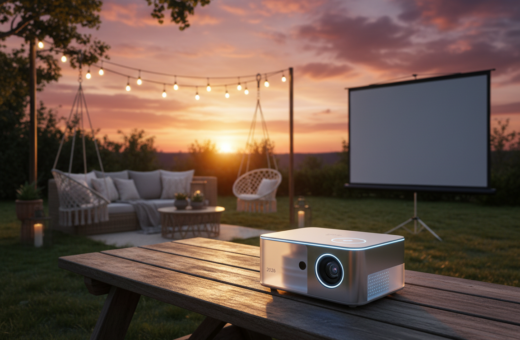
Environmental Factors Affecting Outdoor Performance
Ambient light and setup choices decide how well an outdoor screening performs. Even a bright unit will wash out against direct sun or strong street lamps.
Placement and airflow are critical. Keep at least 12 inches of clearance around all vents so the fan can work and the lamp stays cool.
Managing Ambient Light and Contrast
Use a dedicated projector screen with high contrast to reflect light better than a plain wall. That step keeps the image punchy at dusk.
- Pick evening hours or shade to reduce ambient glare.
- Clean air filters regularly; dust buildup cuts cooling and can cause sudden shutdowns.
- Set the brightness mode and other settings to match the light level to preserve lamp life and power efficiency.
- Respect throw distance to fill the screen without heavy keystone correction; this preserves detail during projection.
Also confirm the source and hdmi connections before starting. Small checks of distance, vents, and settings save time and keep the outdoor show running smoothly.
When to Seek Professional Support
When the device still fails after basic checks, it’s time to move from troubleshooting to professional diagnostics.
If the unit gives off a burning smell, makes unusual noises, or shows no lamp output, stop further DIY tests. These signs often point to a serious hardware fault.
A persistent indicator that flashes red or orange usually needs expert inspection. Likewise, when the device won’t accept any input or recognize an HDMI cable after multiple swaps, the internal identity chip may be corrupted.
- If power and cable integrity are verified but the unit still won’t turn on, seek a certified service center.
- After a full factory reset and repeated failures, professional repair is recommended.
- Do not open the casing; consult the user guide first to avoid voiding warranty and risking the lens or fan.
ETOE provides a two-year warranty on their projectors, double the common 12-month term. That coverage offers a clear path to authorized repair or replacement when solutions require expert care.
Conclusion
A careful setup and regular checks prevent most late-night failures during screenings.
Most issues are not permanent hardware failures but come from configuration choices or the environment. By following this guide and the quick tips inside, users can keep their projector and projector screen aligned for a clean, bright image and longer lamp life.
Managing input and source selection, watching ventilation, and performing basic troubleshooting will stop many common problems. They should also use reliable cables and place the unit within its recommended throw distance.
Final note: routine maintenance and smart setup make a well-kept projector a dependable entertainment tool for years to come.