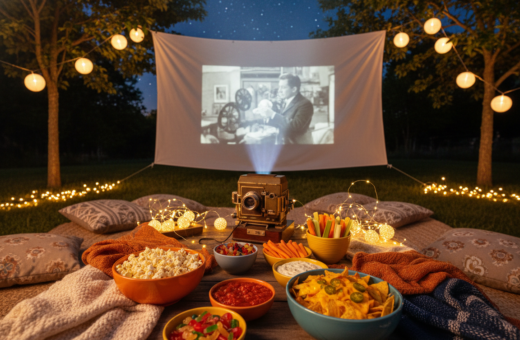
Planning a movie night in the backyard starts with the right balance of screen and ambient light. The Society of Motion Picture and Television Engineers (SMPTE) offers guidance used in cinema that helps guide home projection choices.
Careful preparation matters. Hosts should match projector brightness and lumens to the space and expected sunlight. A high-quality projector and dedicated screen deliver superior image and color compared to makeshift alternatives.
Controlling light in the yard creates a theater-like viewing experience. They should consider screen size, natural light at dusk, and how nearby lamps or streetlight will interact with projection.
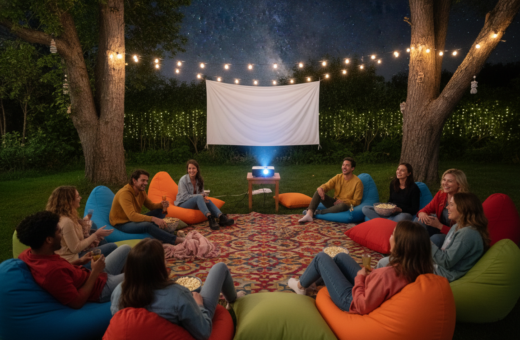
When the group gathers, a balanced approach to screens and ambient light ensures consistent image quality across movie nights. Proper planning lets users focus on film and friends instead of fighting glare or poor contrast.
Understanding the Impact of Ambient Light on Projection
Ambient glow in a backyard can change how an image reads on screen in minutes. Small shifts in nearby light alter contrast and color. This directly affects perceived brightness and the viewer’s immersion.
Glare versus Washout
Glare versus Washout
Glare creates hot spots on a screen and draws attention away from the picture. Washout lowers contrast and mutes color, making details hard to see.
- Street lamps or moonlight can cause glare on the projection surface.
- Washout makes even high-lumen projectors look dull.
- Special screen materials and placement help reduce these effects.
Time of Day Considerations
Light levels change from sunset to deep night. Choosing a projector must account for these shifts. Testing at different times reveals how the image holds up.
“The Society of Motion Picture and Television Engineers (SMPTE) recommends 16 foot-lamberts for a darkened movie theater to ensure a professional cinematic viewing experience.”
Selecting the Best Lighting for Outdoor Projector Setup
Minimizing stray glow lets the projected image keep its punch and clarity.
Start by removing direct sources of glare. Keep streetlamps and porch bulbs pointed away from the screen. This reduces washout and preserves color and contrast.
Choose a stable screen. The Elite Screens YardMaster is a pre-assembled, foldable option that holds tension and stands up to light wind. A taut surface beats a bedsheet every time.
- Consider inflatable, tripod, or foldable models to match yard size and layout.
- Pick screen material that reflects light evenly; it affects image brightness and color.
- Position the projector and screen to avoid adding artificial bulbs near the viewing axis.
Good pairing matters: a quality projector and a dedicated screen create a professional backyard movie feel that is reliable and easy to manage. For a practical guide on placement and gear, consult this backyard movie night with a projector.
The Role of Projector Brightness and Lumens
Projector brightness directly shapes how vivid images look on an evening screen. Choosing an appropriate lumen rating helps maintain contrast and color as ambient light shifts. ANSI lumens offer a consistent way to compare models and predict performance in a backyard environment.
ANSI Lumens Explained
ANSI lumens measure a projector’s true light output across multiple points. This standardized metric makes it easier to choose a unit that will be bright enough for a given screen and time of night.
Screen Size Requirements
A 100-inch diagonal screen typically needs 1600–2000 lumens for night viewing to preserve image detail. Larger displays scale quickly: a 200-inch screen often requires 5400–7200 lumens to keep color and contrast strong.
Throw Distance Impact
Throw distance determines the final image size and affects perceived brightness. Use the projector’s throw ratio to calculate how far to place it so images stay crisp without losing lumen effectiveness.
“Daytime viewing demands far more output; many systems need 3000–6000 ANSI lumens to overcome direct sunlight.”
- Match screen aspect (16:9) to most streaming content for accurate framing.
- Consider screen reflectivity and content type; dark scenes need higher contrast and effective lumen distribution.
- Balance projector distance, lumen output, and space to achieve a theater-like projection experience at night.
Choosing the Right Screen for High-Contrast Viewing
A screen’s material defines how much contrast a backyard cinema can hold as dusk fades. Selecting the proper surface matters more than adding brightness. The right screen lets the projector deliver deep blacks and vivid color without pushing output to extremes.
Ambient Light Rejecting (ALR) technology targets stray light and reflects only the projector’s beams toward the audience. This preserves contrast and keeps the image sharp even when nearby lamps or moonlight are present.
Ambient Light Rejecting Technology
ALR screens use angled microstructures and neutral color balance to block off-axis light. That design helps a single projector show richer blacks and truer color than a plain white wall.
- ALR maintains contrast so the movie retains depth and detail.
- Cinema-grade surfaces provide a smooth finish that improves image resolution.
- Investing in quality screens enhances the performance of projectors and raises the overall viewing experience.
“A proper screen material acts like a filter: it lets projector light through while rejecting stray sources.”
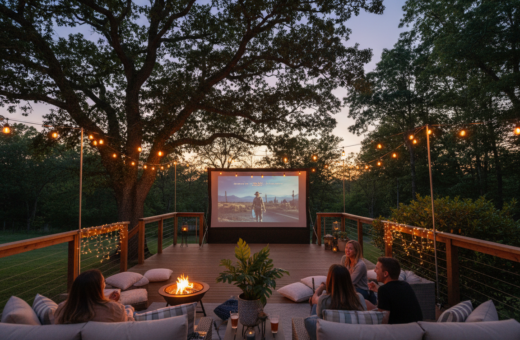
Managing External Light Sources in Your Backyard
Even small sources of stray glow can wash out an evening image, so proactive control is essential. The host should scan the yard before guests arrive and note any direct beams that hit the screen.
Simple physical barriers work well. Trees, fences, and portable panels block streetlamps and porch bulbs without expensive gear. Position screens to use natural shade and reduce reflected glare.
Practical options include installing a retractable screen for recurring movie nights or using blackout curtains behind the display. Keep the projector away from direct light paths; even a small stray beam lowers perceived brightness and contrast.
- Check lumen needs and aim the unit where it faces the audience, not a lamp.
- Use citronella candles or repellant to keep viewers comfortable.
- Be neighbor-friendly: invite nearby households or give a quick heads-up about late shows.
“Controlling stray light lets the projection perform at its best and keeps every movie night enjoyable.”
Strategic Placement of Your Projection System
Where the projector sits defines sight lines and keeps shadows out of the picture.
Front versus rear projection
Front versus Rear Projection
Front projection requires careful audience layout so no one casts a shadow across the screen. Seats should be offset or slightly raised to keep heads below the beam.
Rear projection can solve that issue if the host uses a screen made to transmit light. It moves the unit behind the display and keeps the viewing area free of obstructions.
Controlling Viewing Angles
Viewing angles affect contrast and color. Use a screen with a wide acceptance angle when viewers sit off-center.
- Short throw and ultra short throw units let the device sit close to the screen and reduce shadows.
- Check the throw ratio to set the exact distance that fills the screen with a sharp image.
- Align the lens with the screen’s center and lock mounts to prevent drift during a movie.
“Proper alignment of the projector and screen is the foundation of a professional-looking backyard cinema.”
Calculating Necessary Brightness for Your Specific Environment
Calculate required brightness using screen area, gain, and the target foot-lamberts.
Use the formula: Lumens = Foot-lamberts × Screen Area ÷ Screen Gain. This gives a practical lumen target tailored to the scene and the chosen screen.
Daytime viewing in a backyard typically needs about 3000–6000 ANSI lumens to overcome direct sunlight. Evening shows need far less, commonly 500–2500 ANSI lumens, when ambient levels are controlled.
Always factor screen gain and aspect ratio into the calculation. A 16:9 ratio is standard and keeps content framed correctly. Screen size and throw distance change the required output, so measure the final image area before you buy.
- Check whether the chosen screen has gain above 1.0; higher gain reduces lumen demands.
- Account for nearby light sources and sunlight when picking a lumen range.
- Use the formula to confirm the unit is bright enough for the intended environments.
“Matching lumens to screen area and gain removes guesswork and prevents dim or washed-out images.”
Enhancing Image Quality Through Proper Calibration
Matching the projector to the screen’s reflectivity unlocks a clearer, more consistent viewing experience. Calibration is not a one-time task; it is an adjustment process that tunes brightness, black levels, and color to the actual environment.
Adjusting Black Levels
Deep blacks make contrast pop and keep detail in dark scenes. Start by lowering the black level until shadow detail appears without crushing darker tones. Use a test pattern or calibration disc when possible.
Use a unit that supports 2000–2500 ANSI lumens so calibrated settings hold up when a little ambient light is present. Then fine-tune contrast and brightness so highlights are bright but not blown out.
- Match gain: set the projector to account for screen gain and reflectivity.
- Color balance: adjust color temperature and saturation for natural skin tones and film color.
- Consistency: recheck settings after placement changes or if the viewing distance shifts.
“Proper calibration turns a backyard movie into a true cinema experience.”
Regular calibration keeps the image clear and the viewing experience professional. Small, repeated tweaks deliver long-term quality and make every movie night look like a theater screening.
Common Mistakes That Ruin Outdoor Screen Visibility
Small mistakes in gear and placement often turn a backyard screening into a frustrating evening.
Using a bedsheet as a screen creates wrinkles and lets light pass through. That kills image quality and contrast.
Failing to plan for wind means the screen will ripple. A moving surface distracts viewers and blurs the image during a movie night.
Underestimating ANSI lumens is another frequent error. A dim projector cannot compete with ambient light in the backyard and leaves scenes washed out.
- Not calibrating the projector for the environment causes poor color and faded blacks.
- Picking a unit with too low brightness for the chosen screen size limits visible detail.
- Skipping anchors or ties lets a screen fall over and ends the show fast.
- Using models designed strictly for indoor use without checking lumen needs leads to disappointment outdoors.
“Avoiding these pitfalls keeps every outdoor movie night professional and enjoyable.”
Conclusion
, A clear lumen plan makes the difference between a faded image and a crisp movie night. Selecting the right lumens dictates how vivid images appear across changing conditions and sunlight levels.
They should use the formula that links screen size, gain and ambient light to calculate required ansi lumens. Daytime shows need far more output than a night screening, so plan accordingly.
Other factors — screen material, throw ratio, and content type — shape final brightness and image clarity. With proper preparation and the right gear, any backyard can deliver a professional viewing experience and memorable movie nights.