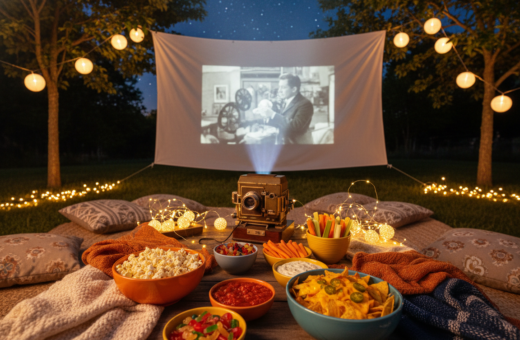
The right setup turns an evening into a memorable outdoor movie night. A high-quality projector such as the XGIMI Halo+ (New) delivers 700 ISO lumens, which helps keep the image bright even when ambient light is present.
Good screen choice and careful placement make a big difference. Poor alignment or the wrong projection angle causes distortion. Ambient lighting and nearby lights will wash out the picture if not managed.
Sound matters too. Testing the audio system and speakers ahead of time ensures clear sound across the lawn. A proper extension cord and attention to power and safety complete a professional-feeling setup that improves the viewing experience.
Understanding Common Backyard Projector Placement Mistakes
Small alignment errors can turn a pleasant outdoor screening into a frustrating viewing session. This section explains how keystone distortion, hot-spotting and simple geometry affect image quality and the overall theater experience.
Identifying Keystone Distortion
The keystone effect happens when projected light strikes the screen from too high or too low an angle. The image becomes trapezoidal and loses sharpness.
Many users try to fix this digitally and the result is softer edges. Proper physical alignment avoids that trade-off and preserves contrast.
Avoiding Hot-Spotting and Glare
Hot-spotting often appears with high-gain or ambient light rejecting surfaces if projection comes off-axis. That bright patch breaks uniformity and hurts viewing.
- Check the recommended throw and measure the distance to fill the screen.
- A textured wall will create artifacts; use a smooth screen surface instead.
- Control nearby lighting and point sources to reduce unwanted glare and ambient light washout.
The Importance of Timing and Ambient Light Control
Start the show 30 to 60 minutes after sunset to let natural light fade and protect contrast. Experts say this window helps the projection reach full brightness without fighting residual daylight.
Finding the sweet spot for projector placement means balancing equipment brightness with the amount of light in the room or backyard. Test a few angles to reduce glare and keep the screen uniform.
Sound and safety matter too. Position the audio system and speakers so every guest hears clearly. Secure power and tidy extension cords to avoid trips in the dark.
- Turn off porch lights and nearby lamps to control ambient light.
- Plan the event time around the sun’s angle to avoid early glare.
- Verify the screen is secure and the projector is stable before showtime.
These simple steps improve the outdoor movie theater experience and reduce mid-show interruptions. A little planning on time and lighting goes a long way.
Selecting the Right Screen Material for Your Space
Choosing the right screen fabric shapes how every frame looks and feels. The material you pick directly affects contrast, color and perceived brightness. Match the screen to the local lighting and the projector’s lumens for the best results.
Matte White Versatility
Matte white screens work well with most projectors and suit varied viewing angles. They provide even diffusion and keep colors natural. For a wall-mounted or inflatable screen, smooth tension helps avoid ripples that distort the image.
Ambient Light Rejecting Options
Ambient light rejecting (ALR) surfaces reject up to 95% of overhead lighting. They are an excellent option when you cannot fully control outside or room lights. ALR maximizes contrast and preserves black levels in challenging sites.
Ceiling Light Rejecting for Short Throw
Ceiling light rejecting materials suit short-throw setups where overhead lights can wash the image. Verify the manufacturer’s specs and ensure the screen size matches your projector’s throw and lumens.
- Tip: Confirm your projector’s output is adequate for the chosen size screen.
- Inflatable screens must be tensioned to avoid ripples and uneven projection.
- Pick a screen material that aligns with your use case to improve the viewing experience.
Mastering Projection Angles and Vertical Alignment
Precise vertical alignment transforms a shaky projection into a crisp, cinema-style image. Mastering the vertical lens shift keeps the image square on the screen without moving the unit.
Adjust the angle so light strikes the screen evenly. That is the best way to avoid keystone and preserve contrast. A projector with vertical lens shift lets users fine-tune height and still keep high image quality.
Keep speakers and other audio gear away from the lamp and vents. This prevents interference and keeps sound clear during the movie. Use a strong, sturdy mount and tidy cable runs with an extension cord for safety.
- Verify the wall or screen is plumb and centered before testing.
- Calculate the tilt so the projection fills the screen uniformly.
- Rely on higher lumens when some ambient light is unavoidable.
Small angle changes produce big results. A careful setup saves time and improves viewing for everyone.
Calculating Throw Distance for Optimal Image Size
A precise distance calculation keeps the picture bright and the framing accurate. Use simple geometry to plan where the device should sit so the image fills the screen and stays sharp.
Apply the formula √(A² + O²) = H to find the required throw distance. Measure the adjacent (A) and opposite (O) sides of the triangle formed by the lens and screen, then solve for H. This gives a reliable starting point for your setup.
Using Zoom and Lens Shift Functions
After positioning at the calculated distance, use zoom to fine-tune image size. Lens shift lets the unit move the picture vertically or horizontally without keystone correction.
- Match content to the screen aspect ratio to avoid distortion or black bars.
- Account for ambient light and lumens when choosing size screen; higher lumens allow a larger image.
- If the image is dim, reduce the size screen or move the unit closer to increase brightness.
Stabilizing Your Setup Against Environmental Factors
Wind and uneven ground can undo hours of careful setup in minutes. A secure foundation keeps the image steady and the movie night running smoothly.
Secure inflatable screen frames with heavy-duty ground stakes or sandbags. Tie-downs and cross‑stakes reduce sway and stop tipping in gusts.
Place the projector on a stable, non-slip surface to avoid wobble. A low table or dedicated mount locks the unit in place and preserves sharp projection.
Route the extension cord along clear paths and fasten it to avoid trips. Keep cords off damp grass and use outdoor-rated cables to prevent electrical hazards.
- Check that any wall used as a screen is clean and smooth to protect image quality.
- Control ambient light with directional lighting or by changing the angle of screens to reduce glare.
- Verify all anchors and equipment stability right before showtime to prevent accidents.
By securing screens, gear, and cables, they ensure a reliable viewing experience for every guest.
Enhancing Audio Performance in Open Spaces
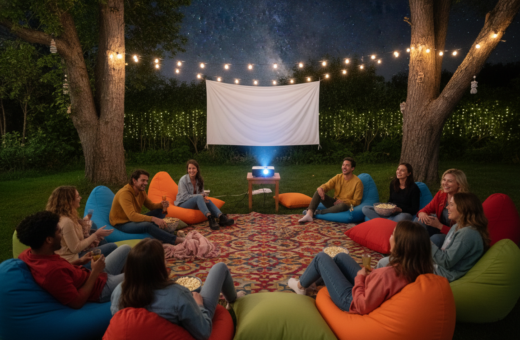
Speakers positioned for the audience keep conversations intelligible even in open areas. Good audio makes the difference between muffled lines and crisp dialogue for an outdoor movie night.
Positioning Speakers for Clarity
Place the speaker system close to seating rather than beside the projector. Sound loses energy quickly in open air, so audience‑side placement preserves clarity.
Use two or more speakers spread evenly. Aim each speaker toward the listening area and adjust the angle to reduce reflections off a wall or screen.
- Tip: Elevate speakers slightly so sound reaches over heads without blasting the first row.
- Consider adding an external audio option if the built‑in speaker on the projector is weak.
- High‑quality speakers keep dialogue sharp and improve the overall experience.
Managing Volume for Neighbors
Keep volume reasonable, especially late at night. Test sound at seating distance and lower levels to prevent disturbance.
If needed, point speakers inward and use directional models to contain sound. This balances a strong home theater effect with neighborly respect.
Managing Power and Connectivity Safely
Reliable connections and tidy cables matter as much as image and audio for an outdoor show. Managing power and connectivity safely is one of the most important things to do when setting up a projector in the backyard.
Always use outdoor‑rated extension cords and keep all electrical connections off the ground to protect them from dew and moisture. Elevate power strips on a small table or hang them from a sturdy frame to avoid damp grass.
If streaming the film, confirm the Wi‑Fi signal is strong to prevent buffering. Test the network and run a short stream during setup time to verify a smooth experience.
Turn off and unplug the projector and other gear immediately if rain begins. Keep the screen and electronics away from low spots where water can collect.
- Use cable covers to reduce trip hazards and tidy the setup.
- Test power and connectivity before guests arrive to avoid last‑minute issues.
- Keep spare extension cords and a surge protector on hand for safe operation.
Testing Your Configuration Before the Main Event
Running a timed pre-show routine reveals alignment or audio problems while there is still time to fix them.
Perform a 10-minute pre-show test to confirm the projector and projector screen are aligned and secure.
Start by checking focus and brightness so the image looks sharp and vibrant for the outdoor movie. Verify that the size and throw distance match the chosen screen.
Confirm audio sync and speaker clarity. They should deliver dialogue without echo or lag to improve the overall experience.
- Adjust the angle to find the sweet spot that keeps the screen evenly lit.
- Turn off or dim nearby lights to reduce ambient light and protect image quality.
- Secure the extension cord and verify power stability so the setup runs through the entire time.
A short, focused check saves last-minute fixes and ensures guests see a bright, well-aligned image.
For technical tips on vertical alignment and angle effects, review guidance about vertical projection angles.
Conclusion
A thoughtful plan, good gear choices, and a brief rehearsal create a dependable home theater for any event. ,
Start by choosing the right projector screen and a compatible screen material. Check alignment so each image is sharp and evenly lit.
Balance sound and lighting to make the experience feel like a true theater. Test audio, cables, and connectivity well before guests arrive.
This simple way of preparing reduces surprises and improves long-term results. With attention to gear and safety, outdoor screens deliver great viewing for every gathering.